Before I start any project whether big or small I always put together a board. There are two types of board mood boards and inspiration boards. why make one...
- its fun and it start the creative juices flowing
- it helps to organise those initial vague ideas, colour options, encouraging solutions to specific challenges, for example how you are going to set yourself apart from the other crafters.
- we often know in our minds what we want or how we want to portray a particular project , but find it difficult to narrow down our ideas.
 |
| Christmas board |
This is where our board helps us.
Ask any designer the answer will be yes every time. They are a great way to visualise and bring together colours, textures bringing clarity to your ideas.
 |
| Gathering colours |

Ok so we have two types of boards, what is the difference?
Mood Boards are exactly that, it is a board that harnesses and illustrates inspiration and ideas that convey a feeling, style, ambience this board is all about emotion and psychology.
Inspiration Boards are a more visual and specific, it is a collection of references or prototypes of elements that will eventually form part of the design or project, literally colours, forms, textures, lines.
the mood board should influence what goes on the inspiration board which should respond to the mood board.
Whatever way you look at it they are both ways to brainstorm and organise the ideas you really like, they will keep you focused, help filter thoughts and ideas trapped inside your head.
Boards are also useful when working in a group for instance what you may see as romantic may not be the same as someone else. they are especially useful if you are hiring someone to help you with the graphics and web design of your brand.

Wall-mounted inspiration boards are satisfyingly tactile and can be unique wall art in their own right. Let these 12 fresh takes on the classic bulletin board inspire your own installation, from clipboards and pegboards to entire walls filled with ideas.

Use clipboards to organize your display. If you have a lot of projects going on at once or simply like to keep your mood board items orderly, a grid of clipboards could be just the thing.
Clear plastic clipboards look sleek and allow a rich wall colour to show through. Use tags to label each board with a theme or project
Clear plastic clipboards look sleek and allow a rich wall colour to show through. Use tags to label each board with a theme or project

Incorporate a pegboard for larger items. This hardware store staple takes on new life when painted to match your wall colour. Use hooks or pegs to attach larger items like fabric swatches, or clip up art prints you do not want to damage by pinning.
Pair it with a traditional corkboard painted the same hue for a seamless look with twice the function.
Pair it with a traditional corkboard painted the same hue for a seamless look with twice the function.

Cluster lots of mini boards. Spotted some fun little bulletin boards but worried one won’t provide enough room for all of your ideas? Don’t just get one; bring home an armful!
Arrange them on the floor first until you find a combination that looks pleasing, then attach them to the wall. If the boards are very lightweight, you may even be able to use removable picture hanging strips instead of nails — so you can rearrange whenever you like without damaging your walls.
Arrange them on the floor first until you find a combination that looks pleasing, then attach them to the wall. If the boards are very lightweight, you may even be able to use removable picture hanging strips instead of nails — so you can rearrange whenever you like without damaging your walls.

Expand display possibilities with a floating shelf. Houzz user Tina Fussell simply taped her inspiration photos to the wall above her desk with washi tape. A shelf mounted above allows her to prop and shuffle larger photographs, framed artwork and objects for a richly layered display. Mount two-arm lights on the shelf or the wall above to illuminate your workspace without cluttering the surface.

Anchor a loose arrangement with a chunky frame. Like to pile on the inspiration? Give your arrangement some structure by choosing a big board with a thick wooden frame. The defined edge will help your layers of paper inspiration look intentional — even if you stray onto the surrounding wall.

Use linen-covered cork for a chic look. Make a simple, frameless pin board by covering a cork or Homasote board (made from recycled paper) with natural linen or another textured fabric. Add a thin layer of batting (available where quilting supplies are sold) before covering with fabric for a softer look, and use a staple gun to secure the fabric to the back of the board

Cover an entire wall in pin-able material. A floor-to-ceiling bulletin board wall can make an eye-catching feature in a bustling family home or office. Be aware that you may need professional help to get a perfect fit and to install such a large board. If you have children, they can take over the lower section with their own artwork and bits and bobs of inspiration, while you can have free rein on the top sections.
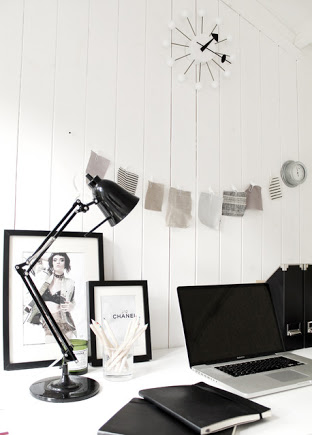
Hang an inspiration string with paper clips and twine. Just have a few little things to display? This minimalist setup may be the one for you.
Tap in two thin nails, using a level to be sure they are straight, and tie a length of twine between them. Use paper clips or mini clothespins to attach photos or fabric swatches to the string.
Tap in two thin nails, using a level to be sure they are straight, and tie a length of twine between them. Use paper clips or mini clothespins to attach photos or fabric swatches to the string.
Add flair to the homework zone. A bulletin board is a great spot where kids can post their own artwork, snapshots, bits of memorabilia and — maybe — homework assignments.
For younger kids, a magnet board with large (that is, a nonchokable size) magnets hung low on the wall is a fun alternative.
For younger kids, a magnet board with large (that is, a nonchokable size) magnets hung low on the wall is a fun alternative.
Personalize your board with nail head trim. Take a tip from decorator Maggie Stephens, who covered a plain bulletin board with fabric and then used upholstery tacks to give it a custom look. To make your own, look for nail head trim or upholstery tacks online or in a local fabric store.
Consider moving it away from the desk. If you use an inspiration board in your home office, consider placing it on an adjacent wall instead of directly over your computer. This will make saving things easier and give you something pretty to check out when you get up to stretch your legs!
Sourcing media for your boards is so easy, pick up paint, wallpaper swatches from your local DIY store and
Texts Quotes Poems
Magazines
ribbons
Threads
Beads
Buttons
Fabric
Postcards
Small toys
Junk jewellery
Dried & fresh flowers
Maps
Train plane and concert tickets
Shells
Anything and everything that captures a mood
Boards are fun and easily made either by hand or on the computer and often are free or just a few pence.
Why not create a board for decorating your craft/work space? That way you are creating and synchronising your brand with all your creative inspiration around you.
Planning
What kind of mood are you looking for?
What is it going to be about?
What is it's purpose?
What is your goal or dream? Your board needs to inspire you.
Branding What do you want your board to say about you?
What is the emotion you want your product launch or website to generate, playful, light hearted, warm and endearing, glamorous and sophisticated.
Gather all your initial ideas, images and finds spread them on the floor board or large table, move them around and see how everything works together. Then start tearing interesting images from magazines or printing images you find on line, look for imagery that "speaks" to your design, aesthetic you will often see a pattern emerging once you have laid out all your images and you will see colours, materials that you are attracted to, ones that you prefer to than others.
This task needs to be approached with a light heart and a playful mind and a mood will come to you.
Keep taking a step back, glancing back removing anything that doesn't go with the flow, take a couple of days to mull look at in different lights,
The next step is to find a platform for your board, ideally mounted on a wall, decide whether you want a pin board, clipboard or digital think about what suits you and your space and can easily be viewed .
I have a large ornate mirror that I brought from a car boot, I used Valspar spray paint,
covered the back with pretty paper, I pin bits and pieces on it using pretty decorated push pins and pegs, (I will post a tutorial for makes in another post).
Please remember if you ever want to share your board on line, you will want to chose public domain images to avoid copyright.
Take a photo of your board to carry around keep checking it to make sure you are keeping on track.
Use your board to inspire the graphics for your branding. Images might include other works of art you admire, your favourite print, texture or patterns, texts might include quotes and words specific to your brands.
Generally your boards are not trying to be works of art rather a collection of images and ideas that inspire.
Now you have an organised craft/work space, a mood board that sums up your brand and an inspiration board to project the mood and feeling of your brand.
A few quick tips...
Magazine tear sheets tend to get tatty over time print a copy this helps when re-sizing
Spray adhesives work well on cardstock but please remember to use in a well ventilated area and cover surfaces with paper as this task can be messy.
If you don't like the idea of using pins then magnets are a great alternative, magnetic surfaces can be found in most high streets.
Pain charts are a great resource and of course free.
The only rule is there are no rules just let your creativity flow


Why not start branding your work space?
You can brand your space in a much more subtle way
For me it is modern country, soft muted colours with a touch of vintage shabby.
Our next chapter will cover "Branding".....
No comments:
Post a Comment